Standpipe & High-rise Packs - Part 1
Preparation before an emergency is commonplace to us in the fire service. For fires in standpipe-equipped buildings, this statement couldn't be truer. Is your department prepared to respond to a fire in a standpipe-equipped building? In particular, can you respond to the typical residential high-rise building and get a line into operation from a position of safety and execute an aggressive interior attack?
The answer may surprise you. In this series of articles we'll look at the preparation and use of the high-rise hose pack "system." Many departments put together a hose pack or standpipe pack that has a mix of all items and then they hope that the weight alone won't kill the member tasked with carrying the load. Worse, many hose packs are set up for failure by limiting the amount of hose available and gallons per minute that the crew can flow.
In this three part article series, we'll break the concept down into the following areas of study:
- Part 1 is an overview of the high rise hose pack system
- Part 2 is the method of packing and preparing the system
- Part 3 is the set up and use of the three piece high-rise hose pack system
We will explore a method of packing high-rise hose packs that is both realistic and offers significant flexibility. Before we actually explore this concept, any fire officer thinking about altering or improving their department operations in standpipe equipped buildings would be best served to read Firefighting Operations in High-Rise and Standpipe Equipped Buildings by District Chief David McGrail of the Denver Fire Department. This exceptional text explores many facets of firefighting in such occupancies and actually formed the building block for my own departments' high-rise hose packs.
This series of articles builds on different experiences and is geared towards a department where staffing is very limited initially, where maneuverability has presented problems in the past and where the other end of the spectrum of high flows and large capacities could face our members.
The Three-Piece Setup
It's not realistic to expect that one person can carry up all of the needed hose and appliances for a fire in a high-rise. Past experience with "hand trucks" proved to be heavy and awkward and hard to maneuver up multiple flights of stairs as well as presenting problems with cabinet space on the apparatus. What was needed was the ability to get a powerful punch into operation relatively fast with a small team and to do so without physically exhausting the members.
The first rule of thumb with the high-rise pack system is that it is a "system." For it to be effective three members must each take a piece of the "system" and assemble on the floor below the fire. This isn't an unrealistic request. Fires are staffing intensive and it is unrealistic to believe that one or two firefighters are going to battle such a fire alone.
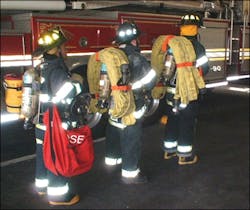
Therefore the hose pack system consists of three separate parts that are each carried by a single member (see Photo 1). The weight is equally distributed and as we shall see, and the system permits hands free operation and access. "
- The first part of the system is two 50-foot lengths (connected) of 2 1/2-inch hose with an attached 1 3/4-inch smoothbore nozzle on the hose's male coupling (see Photo 2).
- The second part of the system is two 50-foot lengths (connected) of 22 1/2-inch hose with an attached inline pressure gauge on the hose's female coupling (see Photo 3).
- The third part of the system is a tool bag (see Photo 4) with the following items:
- One 50-foot length of 1 3/4-inch hose
- One 15/16-inch smoothbore nozzle attached to the length of 1 3/4-inch hose
- One wire brush o Half a dozen door chocks
- One pipe wrench at least 14 inches long
- One 1 1/2-inch double female adaptor
- One 2 1/2-inch to 1 1/2-inch reducer
- One 2 1/2-inch double male adaptor
- Two spanner wrenches
The Three Items To the Floor Below
Let's see just what this three-person team can bring to the floor below the fire and what their capability is.
The 2 1/2-inch hose offers enormous punch for the engine company and should be considered the standard diameter for fire attack in buildings with standpipes for several reasons.
One reason is the potential loss of pressure as we go higher and higher. If we have limited pressure to supply our lines, we need to maximize what is available. The only way to do this is with lower operating pressures on our nozzles and with a larger diameter line. Problems involving pressure reducing vales (PRV's) or pressure regulating valves can also limit the flow of water and should be considered ahead of time.
Also, there is "reflex time." The reflex time is basically the time from when the call is received to when water is actually flowing on the fire. To get a line into operation on an upper floor (say the 15th floor) can be very time consuming, maybe as long as 20 minutes. This, coupled with the rate of heat release in today's residential occupancies is severe and if you throw in a windswept fire, then you have the need for a flow rate far greater than is required for the typical 2 1/2-story wood-frame dwelling.
The 1 3/4-inch smoothbore nozzle flows 325 gallons per minute (gpm) at 50 psi nozzle pressure, which translates into a powerful punch. The nozzle reaction from this much water flowing does present a danger if it isn't controlled properly and trained with ahead of time.
We will not debate the smoothbore nozzle verse fog nozzle debate here. Many good departments put out fires with both types of nozzles on a day-to-day basis and if applied properly, the fire goes out.
I would like to take this time to emphasize why I opt for the smoothbore nozzle for a high-rise pack and for standpipe operations. The answer has nothing to do with the issues of water application typical of each school of the smoothbore verse fog nozzle debate. The problem with standpipe operations is the potential for debris in the building's pipes, risers, and infrastructure.
Debris causing a nozzle to clog 15 floors up could be catastrophic. It is no easy task to go get another nozzle or to go to the fire attack stairwell or the floor below (areas of refuge) to clean the debris from the nozzle. To limit the chance of clogging and obstructions, a smoothbore orifice allows most debris to pass without the firefighter on the nozzle ever being aware of it. The lower operating pressure also has advantages but this can also be achieved with a low-pressure fog nozzle. Nevertheless, only the smoothbore nozzle will pass significant amounts of debris with ease.
Past building fires in residential high rises in the recent past that my organization responded to very dramatically showed that the stream that was discharged initially was a dirty black or brown stream that exited initially from the nozzle when it was opened. There is no telling just how much rust, scale, or other debris came out of those nozzles initially.
So as we see, the 2 1/2-inch hose and smoothbore nozzle have great advantages for fires in commercial or residential occupancies where the hook up is made from a standpipe system.
Both residential occupancies and commercial occupancies demand that you have the maximum punch available. The fire may have a huge headway and even though it is a residential building, the longer time to get water on the fire may require a massive punch, hence the reason for the 2 1/2-inch and 1 1/4-inch tip combination.
Commercial occupancies, with their larger square footage areas and higher fire loads obviously demand the 2 1/2-inch line and 1 1/4-inch tip and most certainly demand a backup line of similar punch. Can your department muster such an attack? Even more importantly, can your department maintain the momentum of the attack as the air supply in their breathing apparatus is rapidly depleted?
200 Feet Of Hose As A Minimum
The amount of hose in the three element system also reveals that we have a total of 200 feet of 2 1/2-inch hose. We hook up on the floor below the fire because it is considered an area of refuge or safety. It is an area where we can prepare and then deploy in a safe manner. This length allows us to use a length of hose to get from the floor below up to the fire floor followed by an additional 150 feet to get to the fire.
In many jurisdictions, it's important to know the codes that govern standpipe placement. Farther or more distant locations of outlets can very possibly require more hose. If a recon of the area is not made, members may stretch from a more distant standpipe outlet only to find that they don't have enough hose.
In many situations, we will not require 200 feet. A reconnaissance of the fire floor may indicate that the close proximity of the standpipe outlet and the location of the fire requires only a limited amount of hose. If that's the case, it's a simple manner to hook up what you need on the floor below and leave what isn't required to the side of the hallway. It is far better to have everything you need than to have to run down stairs and get one more item! You can look at the 200 feet of hose as a starting point for your operations.
The Remaining Appliances And Accessories
What are the other appliances and accessories though?
What is the role of the inline pressure gauge (see Photo 5)? Attached to one of the hose packs is an inline pressure gauge. Its purpose is to connect to the standpipe outlet on the floor below the fire and then the appropriate amount of 2 1/2-inch hose is connected to the inline gauge. Why? Well, the firefighter who will be tasked with supplying the line off the standpipe must not over pressurize a large attack line because he could cause more harm than good! By "pin striping" the inline gauge or marking it with the appropriate pressure, it's a matter of opening the outlet until the desired pressure is read.
OK, what about the other accessories in the bag?
The wire brush is used to remove paint or other buildup from the standpipe outlet threads that could prevent hooking up the line. The door chocks prevent doors from closing on a hoseline and acting as a hose clamp. The spanner wrenches are used to aid in removing caps from outlets that have been there for years. The pipe wrench is of value if the control wheel is missing from the outlet.
Converting a Class 2 outlet to a Class 1 outlet
The adaptors and reducers that are also in the bag work like this - Let's say members encounter a standpipe outlet with 1 1/2-inch threads (Class 2 outlet, see NFPA 14, Standard for the Installation of Standpipe and Hose Systems, 2010 Edition, section 3.3.14). How can they use their 2 1/2-inch line? The outlet is a 1 1/2-inch threaded outlet so the first thing we do is to connect a 1 1/2-inch double female to it. Then we connect the 2 1/2-inch to 1 1/2-inch reducer to that. Finally, we take our 2 1/2-inch double male and connect it as the outer most point. Thus, we have created a "Class 1" standpipe outlet from where there was none. It won't provide the same flow as a Class 1 outlet but we'll maximize its potential!
Try this some time as a company drill. Convert a Class 2 standpipe outlet (1 1/2-inch male outlet) to a Class 1 outlet (2 1/2-inch male outlet).
The 1 3/4-inch length of hose and nozzle
What about the length of hose and nozzle that's in the bag? Well this brings us to the part of the article on increasing department flexibility and options!
If reconnaissance reveals that the fire is of limited magnitude such as a mattress burning or cabinets from a kitchen fire or a fire that is smokier than free burning. The company officer has the option of choosing a 1 3/4-inch line at the end of the stretch.
The 2 1/2-inch smoothbore nozzle has a tapered bore that is screwed onto the nozzle shut off (see Photo 6). If this tapered 1 1/4-inch smoothbore is removed (and placed in your turnout coat pocket to avoid losing it), we are left with a 1 1/2-inch threaded outlet on the discharge side of the nozzle. The company officer could order the length of 1 3/4-inch from the bag to be unrolled and connected to the nozzle shut off in an area of safety (such as in the hallway on the floor below) and then stretched to the point of attack.
The reasoning for such an operation is several fold. If staffing is very limited and a nozzle team of two is assembled, they may be unable to control the nozzle reaction of the 2 1/2-inch line. If the nozzle team can't control the reaction safely, they'll do one of two things, either they'll partially close the bale and much of the needed stream reach and flow, or they'll lose control of the line. Neither option is acceptable. What is needed is an option!
The company officer may need the flexibility of the smaller diameter line, but needs the advantages of the 2 1/2-inch hose, such as the ability to overcome limited pressures. The bulk of the hose stretch is filled out with 2 1/2-inch hose and then a lone length of 1 3/4-inch is attached to the 2 1/2-inch nozzle shut off. By doing this we will be able to move water more efficiently with what pressure is available and we'll get a better stream then had the entire stretch been 1 3/4-inch".
Obviously, in many situations there will be enough flow and pressure to supply a single 1 3/4-inch line 200 feet long, but what if you encounter unexpected pressure and flow problems? Again, have the 2 1/2-inch readily available.
Now we have two firefighters on the single length of 1 3/4-inch hose, which is attached to the 2 1/2-inch nozzle. We can maneuver the 1 3/4-inch line through narrow hallways typical of the urban housing project apartments and the ability to safely control the nozzle reaction from the smaller diameter line. This working length of hose will also benefit us in that most apartments can be reached with a single 50-foot length of hose from the apartment hallway door to any point inside. Take into account a 40-foot stream and we can hit just about any area of any apartment unless an unusual situation is present.
While 1 3/4-inch hose is a great tool in the toolbox, don't be fooled by the residential apartment fire! Be prepared for the big guns immediately!
What if the fire is deemed to be of a more severe magnitude? Well, it's simple, just leave the rolled up length of 1 3/4-inch in the tool bag and keep it on the floor below for later on, such as for overhaul.
Whatever the situation that's encountered, make it a point that you error on the side of caution. The system we are creating here has two options: 2 1/2--inch hose coupled with a 1 1/4-inch nozzle allows 325 gpm attack ability and the 1 3/4-inch hose with a 15/6-inch nozzle provides 185 gpm attack ability. Use your best judgment to choose the correct line as the options and the flexibility is there. If in doubt, go for the bigger punch, or if staffing doesn't permit, consider a more defensive approach by taking advantage of the building's construction features and confinement principles.
Summary
In this article we described the need for flexibility in our standpipe operations and how critical it is that we prepare for such an event. We need to prepare our operations for maximum firepower so the 2 1/2-inch hose with a 1 1/4-inch nozzle equals a 325 gpm combination is a must. Nevertheless, we may find ourselves confronted by a need where maneuverability and a lesser flow is the key to our success and the working length of 1 3/4-inch with a 15/16-inch nozzle allows 185 GPM combination is the more appropriate solution.
In our next article we'll show how to pack the system so that three members can bring everything that's need to the floor below the fire. It's important to remember that the weight must be equally distributed and carried in a fashion that is both comfortable and permits hands free access. This will be covered in Part 2.
Until we meet again, try these short company drill ideas and answer these questions:
- Take out your hose packs/high-rise kits. Assemble them on the bay floor and take an inventory of the different accessories, nozzles, and hose layouts.
- Can you supply water for the fires that can happen in your community (or for the mutual aid city that calls you) 200 feet from the standpipe outlet? Use the National Fire Academy flow formula of Length x Width divided by 3 to compute the amount of fire you can knock down in a typical compartment in your area.
- Think of the commercial areas with the larger square footage and higher fire loads as part of your planning as well; can you handle this fire load?
- What if the outlet has only 1 1/2-inch threads? What if the outlet has only 2 1/2-inch threads? Can you complete the mission?
More next time.
- Armand recently authored a two-part series for Firehouse Magazine that detailed a residential high-rise fire in his department. Read Part 1 and Part 2.
ARMAND F. GUZZI JR. has been a member of the fire service since 1987. He is a career fire lieutenant with the City of Long Branch, NJ, Fire Department and is the deputy director of the Monmouth County, NJ, Fire Academy where he has taught for over 20 years. He has a masters degree in management and undergraduate degrees in fire science, education, and business administration. View all of Armand's articles here. He can be reached via e-mail at [email protected] or [email protected].
About the Author

Armand Guzzi
Firehouse.com Contributor
Armand F. Guzzi, Jr. has been a member of the fire service since 1987. He recently retired a career fire lieutenant with the City of Long Branch, NJ, Fire Department and is the deputy director of the Monmouth County, NJ, Fire Academy where he has taught for over 20 years. He has a Master's degree in management and undergraduate degrees in fire science, education, and business administration. View all of Armand's articles here. He can be reached via e-mail at [email protected] or [email protected].