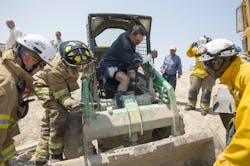
All across the nation, on a daily basis, firefighters and rescue personnel are called upon to use their training to effectively disentangle a victim.
While today’s fire service relies heavily on powered tools to do the job, earlier generations considered tools such as the pike-headed axe to be their must-have tool on a smoky rooftop. While some have chosen to adopt newer technologies, some still rely on these tried-and-true tools. Why? As Chief Pat Nichols of the Boston Fire Department always says, “The axe will always start.”
In the rescue mindset of a firefighter, being able to employ out-of-the-box techniques could be the difference between life and death. Assessing a situation as a team and coming up with the safest and most effective disentanglement procedure is our best plan of attack. Further, instituting simple back-to-basics practices into your department’s operational plans will enhance your rescuers’ capabilities. With that in mind, the following is some guidance about how your department can drill to build these skills as well as information about tools to carry and how to successfully manage a man-vs.-machine incident.
The 10-minute drill
As the officer, you are responsible for setting the drill schedule and topic for your members. I recommend using the “10-minute drill” to give your members the opportunity to train on situations they may eventually face.
Here’s an example: The crew is shopping at the local grocery store for tonight’s meal. In front of the supermarket is a row of toy vending machines. Take 10 minutes to drill on what you would do if a child’s hand became stuck in one of the machines. Allow members to determine their best plan of attack to initiate care. What additional resources should be called for until the child’s hand has been removed? What techniques or tools should be used to free the hand? Could the child aid in their own disentanglement, perhaps by simply asking them to open their hand? Is taking the machine apart an option?
Thinking about an incident before it occurs encourages firefighters to be proactive. In my personal experience, this form of drilling is quite successful and often leads into (or highlights the need for) a longer drill, as members offer their feedback on the operation.
What’s on your rig?
While teaching machinery extrication across the country, many people ask, “What should we carry on our rigs?” Others have shown us compartments filled with large carrying cases that are filled with every tool known to man. My advice is to keep it simple. I prefer “the old-school doctor method”—a quick-hit bag or box that carries initial tools that can start an extrication or may even get the job done. A canvas tool bag (Image 1) or medium-sized hard plastic box is most suitable. If other tools are required from the rig, they can be requested once firefighters have made contact with the victim and assessed the situation.
You’ll want to store in your kit items such as (Image 2) snap ring pliers, a universal socket, rubber bands, lubricant, shims and a swing saw. See the sidebar: Man vs. Machine Kit for a full list of suggested items. Remember, simple hand tools work. If a machine can be assembled, it can surely be disassembled.
A Dremel-type hobby saw is an excellent addition to any Man vs. Machine Kit. Remember, manual ring cutters are limited to the types of metal they can cut and usually do not fair well under the stress put upon them by firefighters. The blades usually wear quickly, and the T-handle that turns the blade easily fails under force. The Dremel tool operates in both a battery and electric model. The price of this tool is comparative to the manual ring cutter, and it will cut through a variety of materials. Use shims and a cooling solution with this tool to gain optimal results. The key to using the Dremel tool successfully is proper instruction and skills maintenance. A simple piece of copper pipe cut to the size of a ring attached to a carrot can assist personnel with keeping their skills sharp for their next ring removal response.
Bottle jacks are under-utilized in our profession, particularly considering how easy they are to use. The bottle jack (Image 3) should be properly marked so that all personnel understand its limitations. Use a paint marker to mark 1) overall tonnage, 2) closed position height and 3) fully opened height. All members of the company should be aware of whether their bottle jack works in both the horizontal position and vertical position. Depending on the type of reservoir system found in your jack, it may not be an option to use it in both positions.
The Porta-Power Tool is the grandfather to many of our extrication tools. Many departments proudly display it in a trophy case. My advice: Get that tool back on the rig! The Porta-Power can be an asset at many types of incidents and a variety of locations, and its numerous attachments and hand-powered pump make it an ideal tool for machinery extrications.
Floor jacks provide a system for lifting a desired load. Requiring minimal space, the floor jack is versatile and easily stored. This tool has increased in popularity amongst many fire departments. Air bags have long been the go-to item when it comes to lifting. While they are successful, they take time to set up, contain different components, and require space to be effective. With that said, if you purchase a floor jack, ensure that it is a brand name and has a suitable lifting capacity.
Game day
You have drilled on machinery rescue techniques, your kit has been designed to handle many types of emergencies and now, the call comes in. It’s time to put your skills to the test. Are you ready?
The dispatch information should give us enough information to develop an initial plan of attack. Ascertain from dispatch if there is any additional information on the entrapment—perhaps even a cell phone photo that the incident commander or other on-scene personnel sent to the incoming rescue unit. Many departments at which I have instructed praise the use of cell phones in providing responders with live visuals that could help responders formulate disentanglement options while en route. Note: The use of cell phones at a scene should be in accordance with your department’s guidelines.
Upon arrival, the officer and a recon team approach the scene with the their complement of tools (the Man vs. Machine Kit and other tools deemed necessary based on dispatch information). The recon team should now determine if any additional tools will be necessary and which tactics will likely need to be deployed at the incident.
Size-up should include the incident surroundings. If you were at the end of a driveway at 5 p.m. with a victim’s hand stuck in a snow blower, perhaps you could consider moving the victim into a controlled environment, such as a garage. At an industrial site, you’ll need to conduct lockout/tagout of the machine. How about shutting down adjacent machines to control the noise level around the operation? Are there any secondary power sources that need to be dealt with? Plant personnel can provide valuable information at these types of operations.
The disentanglement of a victim can be as simple as using a rubber band and soap to remove a ring or as complex as cutting and disassembling rollers at an industrial plant. Many videos are available on the Internet. Don’t watch and simply assume that the methodology is correct. Practice these methods before you employ them in the field.
As an example, one topic that has been a source of popularity on the Internet is using a piece of string or a strap from a non-rebreather mask to remove a ring. The video shows the finger being wrapped from the palm side of the finger to the tip. This procedure pushes the swelling toward the tip of the finger and causes great discomfort to your victim. A simple fix: Wrapping the finger from the tip of the finger to the palm will cause the swelling to be pushed into the hand, causing less discomfort to your victim. Once again, “10-minute drills” and understanding pros and cons will enhance your operations.
Don’t overlook the importance of protecting and packaging the victim during an operation. If a patient is stuck in a device, they may not be able to manipulate a body part to prevent it from further injury. Homemade shims (Image 4) may provide a barrier, while a coolant such as water or duct seal putty (Image 5) can minimize discomfort during the disentanglement. After use, non-contaminated duct seal putty can be stored in a Ziplock-type bag. It should be rolled in a ball and placed inside with a moist paper towel in order to remain pliable.
Make sure the patient is properly packaged during extrication and transport. Devices such as a scoop stretcher have aided rescuers in supporting a victim on both sides of an impalement. Additionally, size up the ambulance, taking into account how much room is necessary to safely transport the patient and the item of impalement. A tape measure is key in this step. Measuring the transport area of the ambulance allows rescuers to make critical cuts to ensure safe transportation to the trauma center. In this day and age, no one wants to carry a victim to the back of an ambulance to find out (under the watchful eyes of many cell phone cameras) that the victim does not fit properly. Smart, proactive actions can save you from being the victim of social media Monday-morning quarterbacking.
Restocking and critique
Once back in quarters, we need to get our equipment restocked and ready for the next run. Once the rig is ready for service, let’s grab a cup of coffee and sit around the best training tool we have—the kitchen table.
The kitchen table provides a platform for lessons learned. All members of the company should sit around the table to discuss the particulars of the call, including what was done right, what could have been done better and what could be done for future incidents.
A pass-along book is a great tool to share information amongst other shifts. If the incident was an “oddball-type emergency,” consider consulting your training division to spread the word to other companies within the department. In the City of New York, we have a “PASS ALONG Program,” which is designed to share vital information from various incidents that could benefit all personnel on future responses.
Be the “Jack of all trades”
The public knows that every time they call 9-1-1, a qualified “Jack of all trades” will be responding to solve the emergency at hand. As rescuers, we need to be proactive in both our approach and response to the multitude of incidents we may face on any given day. Proficiency is critical in our business. Drilling must become a part of our daily routine. It doesn’t have to be long and painful like a dental visit, but it should be a meaningful and significant experience that can help lead members toward gaining the confidence needed to act in an instant and obtain positive results time and time again.
Bio
MARK GREGORY is a 29-year veteran of the fire service. He is a captain in the FDNY assigned to Division 13. He previously served as a lieutenant in Tower Ladder 111 as well as a firefighter in Ladder 132 and Rescue 2. Gregory teaches at the FDNY and Suffolk County Fire Academies and is a partner with P.L. Vulcan Fire Training Concepts.
Sidebar: Man vs. Machine Kit
(Assume one or one set unless otherwise specified.)
Klein canvas bag or a Pelican Box for storage
Allen keys
Adjustable wrench
Robo-grip pliers
Mirror
Tin snips
Ring cutter
Ring cracker
Sheetrock knife
Medical shears
Gator Grip Universal Socket and Wrench
Reversible pliers (Snap-Ring)
Regular Vise-Grip
Needle nose blade Vise Grip
Needle nose pliers
Small bolt cutter
Lineman’s pliers
Small lubricant (soap)
Right-angle grinder
Eye protection (goggles)
PVC saw or fishing line
Lockout/tagout lock
Pig Putty (Plumbers Heat Sink Putty)
Rolls of gauze (4)
Screwdrivers (flat or Phillips) or a combination screwdriver
Wedges (2 wood, 1 aluminum, 1 set old Hurst tips)
Various spoon or knife shims (3-4)
Rubber Bands (1/4”)
Dremel-type hobby tool and spare blades


