Michael Daley describe the ways in which rescuers can train to respond successfully to these emergencies.Today's fire-rescue service must be prepared for all types of emergencies that can arise in the communities they protect. As areas become more populated, construction increases with the production of residential, industrial and mercantile occupancies. One type of emergency that can arise on these sites is a trench collapse, potentially trapping workers beneath tons of soil and trench-related materials. With competent and motivational training, responders can prepare to operate at these types of emergencies efficiently and safely.
Trenches are temporary excavations in which the length of the floor of the trench exceeds its width, and the width of the trench does not exceed 15 feet at the bottom. It is also common for the height of the trench walls to exceed the floor's width.
Trenches are divided into parts:
- The wall or face - The side of the trench from top to bottom.
- The lip - The top two feet of the trench wall.
- The belly - The center portion of the wall.
- The toe - The bottom two feet of the trench wall.
- The floor - The base of the trench.
Trenches are dug for a variety of reasons - in roads to permit the installation of storm sewers and sanitary lines and to bring electric, gas, water and other utilities into homes and businesses. Underground utility wires are becoming more popular in areas where residents wish to eliminate or avoid the sight of telephone and electrical wires strung from pole to pole. Whatever the purpose the trench serves, it is imperative that rescuers recognize the potential hazards they can become.
The Occupational Safety and Health Administration (OSHA) regulation 1926.650, 651, 652 provides guidelines for ways to make trenches safe for workers to enter. For example, any trench that is deeper than five feet requires shoring or a trench box be installed prior to entry. Trenches that are deeper than 15 feet cannot utilize a sheeting and shoring operation, and they require an engineer-designed trench stabilization system be erected prior to workers entering to perform their duties.
Unfortunately, many safety regulations are modified, or even ignored, for the sake of speed and profit.
Rescue teams must become familiar with the OSHA guidelines that pertain to trenches, excavations, protective systems requirements, soil classifications, sloping and benching, and timber shoring to ensure the successful outcome of emergency incidents.
Why do trenches collapse? Here are some common reasons, just to name a few:
- Digging in soil that has been disturbed, even after the trench has been filled for some time.
- Intersecting trenches with inherently weak areas where the trenches meet.
- Soil from the trench, or the spoil pile, that is placed too close to the lip.
- Vibrations from equipment that is working around the trench area.
- Trenches open for long periods lose moisture that helps bind the soil together. Most commonly, though, the absence of adequate shoring is an invitation to disaster, and by far the most frequent reason for the collapse. The natural tendency of soil is to push to all directions, and the trench is a disruption in the soil that allows it to flow in the path of least resistance. It is vital to match the shoring to the soil that the rescuers will be stabilizing to effect the rescue.
Types of soil can be listed in three categories:
- Type A soil has a comprehensive strength of a minimum of 1.5 tons or greater per square foot, and will hold its cohesive quality when it is compressed. This clay-type soil will hold its shape and bind together well.
- Type B soil has a comprehensive strength between 0.5 and 1.5 tons per square foot. It is a wet, saturated soil that may even show water seeping from the trench walls and floors.
- Type C soil has a comprehensive strength rating of less than 0.5 tons per square foot. It is a very loose, running soil that is free flowing, similar to sugar sand, and can be the most difficult to stabilize.
The primary hazard associated with the collapse is the soil. On average, soil weighs 100 pounds per cubic foot, so one can see that a worker buried with two feet of soil on top of his chest can potentially have over 500 pounds of soil pushing down on his body! Other hazards include large pipes, boulders and even heavy construction equipment that may fall into the trench during the collapse, further compounding an entrapment.
Scene size-up is vital for a successful operation. It is important to gain as much information as to:
- The number of victims involved.
- Type of collapse.
- Entrapment problems, such as soil or other objects.
- Dimensions of the trench, before and after collapse.
- Soil type.
- Utility hazards.
- Name of the contractor involved.
- Language barriers between the victim and the rescuer.
- Weather, current and potential forecast.
- Hazards outside the trench, such as vibrations, vehicle traffic and spectators. One of the most important size-up duties is identifying the type of collapse that occurred in the trench. The most common ones are:
- Spoil pile slide, where the pile is placed too close to the lip and falls back into the trench, or is knocked back into the trench by the machine operator.
- Side wall shear, where a portion of the wall shears off and falls into the trench. This occurs in trenches that have been exposed for some time, and an entire wall section cracks and separates from the trench and collapses.
- Slough-in (pronounced "sluff-in") occurs when the belly of the trench wall collapses under the lip, leaving the lip hanging over the trench.
- Lip-in occurs when workers or equipment are working next to or on top of the lip and collapses into the trench.
Depending on the type of collapse, shoring tactics will vary to make the trench safe for rescuers to enter.
Another consideration for size-up is the type of soil involved in the collapse. OSHA 1926.650, 651, 652 lists classifications of soils and their qualities, but there is a field test a rescuer can perform to help identify the soil quality to be dealt with. Take a sample handful of soil from the top of the spoil pile, for that represents the bottom of the trench. Also, take a sample handful of soil from the bottom of the spoil pile, which will represent the soil type at the top of the trench. Squeeze the soil, and see how cohesive the soil is. Try to roll the soil out between the hands to see if it breaks apart, and select the required shoring accordingly.
After the type of soil has been identified, shoring materials must meet the demands of the soil's characteristics. Many rescue teams have on-call arrangements with local contractors to supply them with pre-assembled "trench boxes" in the event of an emergency. These boxes are made of steel, and can cover a variety of trench sizes. Because of their large size and weight, heavy machinery is required to install these boxes in trenches.
Trench boxes are difficult for most rescue services to carry on their rigs. Instead, a rescue team can carry sheeting materials to shore the walls of a trench. These wall panels are made of one-inch Shorform or 11/4-inch marine-grade plywood with 2x12 planks connected in the center for added strength to the wall panel. These wall panels are coated with a phenolic resin that provides even more strength, and helps to seal the panels from decay. Timber, such as No. 1 grade Douglas fir, is added to the wall panels for crossbraces and walers. Wood to be used to shore a trench must be free from physical damage, rot, mildew, warping and insect damage.
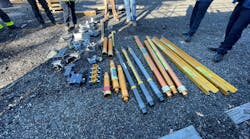
Pneumatic shoring is used in conjunction with wall panels to add speed and efficiency to the shoring operation. Pneumatic struts are comprised of a fixed sleeve and piston, and can be fitted with a multitude of end plates to adapt to the shoring needs. These struts are pressurized through the introduction of nitrogen, air or carbon dioxide. The variable thrust under great pressures is what sets the strut firmly into the wall panels at the required strength. Charts are placed on the sleeves of some pneumatic tools to guide rescuers to the proper pressure the piston is to be "shot" at, or the tool's operation manual will guide the rescuer to the adequate pressure.
Tool requirements do not end with trench shoring. Saws and spare blades are needed to cut timbers to required sizes for cross bracing. Tool pouches and claw hammers are a requirement for the rescuers building the shoring. Rulers, speed squares and retracting tapes will be needed at the cutting station. Plastic utility pails with utility ropes will aid in removing dirt from on top of the victim out of the trench during digging, and camp shovels and air knives will aid in removing soil from around the victim. Be sure the tool cache is well-stocked with any item that may be needed for the operation, or be able to contact a resource to get it.
De-watering operations may become necessary in the event water may be introduced into the trench due to weather conditions, so have pumps on-site if they are needed. Have warming and cooling supplies to keep victims and rescuers comfortable during operations. After a thorough size-up is conducted and an action plan is formulated, the process of making the trench safe begins. Start by approaching the trench from the end, and start to lay ground pads at the lip of the trench. These pads will help to distribute the weight of the rescuers working around the trench lip. Four-by-eight sheets of plywood work well around the trench, but they do not fit at the spoil pile side.
A minimum of two 2x12 planks laid side by side between the trench lip and the spoil pile will aid in distributing the weight of rescuers, and OSHA recommends a minimum of two feet between the lip of the trench and the spoil pile. It may be necessary to remove part of the spoil pile to install the planks, but the planks can be used by the rescuers to stand on while the pile is being removed, and then slid into place.
A safety officer is appointed to oversee all operations around and inside the trench. This person can perform such tasks as atmospheric monitoring, checks of personal protective equipment (PPE) and accountability for rescuers working in the trench. If monitoring identifies a hazard inside the trench, ventilation can be put in place to help make it safe. All possible precautions must be taken to provide for rescuer safety.
After ground pads are in place and initial hazards are addressed and isolated, the task of shoring the trench walls begins. Identify the probable location of the victim and begin installing shoring just ahead of the area, to avoid the installation of shoring on top of victim and to provide a safe area for rescuers to dig from. Wall panels are laid in place on both trench walls, and cross bracing made of timber or pneumatic struts is laid in place. An advantage to using pneumatic struts over timber is that the exposure of the rescuer to the trench is minimized, because the strut can be lowered into place with two ropes, one on each side of the trench, and the strut is then "shot" into place.
The amount of cross bracing, or horizontal shores, depends on the depth of the trench, for it is recommended that one horizontal shore is to be placed for every four feet of depth, but there should never be fewer than two shores per panel. Refer to the OSHA standards charts that list where shoring needs to be placed, both horizontally and vertically, and the size of timber needed for cross braces that is inherent to the soil type found in the trench.
Wall panels and cross braces are installed to cover the entire victim area, and walers are then installed on the top and bottom of the cross bracing. Walers are braces that are installed horizontally across wall panels to transfer loads from the wall panels to the shoring. They will also assist in providing an enclosed area, or trench box, for the rescuers to operate in. The gap between the wall panels and the walers can be filled with 2x12 planks, with the first planks being installed where the wall panels butt up against one another. This shoring process takes time, manpower and all available resources. It is a process that is on-going, even while rescuers are in the trench digging in the area of the victim, and doesn't end until the victims and rescuers are out of the trench.
There may come a time when a trench cannot be made safe with shoring. Trenches deeper than 15 feet, slough-ins, running soils, and massive cave-ins involving both walls and the spoil pile make for treacherous conditions for the rescuers. These situations require that the sides of the trench be dug to the "angle of repose," which is a slope in the ground that will not allow further soil collapse into the trench. Depending on the type of soil, the safe angle required will vary greatly, and will take up much more area at the sides of the trench. This operation requires the use of heavy equipment, and will take much time.
Rescue teams must identify target hazard areas in their communities where they may be required to respond and perform to these types of emergencies. It is recommended that rescue teams that accept this responsibility prepare themselves through training and by identifying the resources and equipment that may be needed to operate safely and successfully when called on to perform their duties.
Michael Daley is a 15-year veteran of the fire service in New Jersey and is currently a lieutenant with Monroe Township Fire District 3. He has served as a chief officer in two fire departments and as a command officer for the Colonia/Keasbey Special Operations Rescue Team. Daley is an instructor at the Middlesex County Fire Academy and has developed the rescue curriculum for topics such as confined space, building collapse and trench collapse rescue operations.


