Early on in my career, I was taught that the quicker we could extricate a victim entrapped in a vehicle, the better. While this is still our objective as rescuers, we must balance the speed of victim extrication with what is going to be best for that patient. It’s not just about the speed every time.
With this in mind, I developed the concept of “Dominating the Pin-In,” which is much more than a catchy phrase; it’s a systematic approach to performing a vehicle extrication with the victim in mind. Dominating the pin-in can be broken down in to four basic phases: 1) size-up, 2) preparation, 3) the actual extrication or cutting and 4) critique/debrief.
Patients first
Before we begin breaking down each concept, let’s discuss the reason we are there in the first place—the patient. The patient’s condition will dictate every step we take on an accident scene as rescuers. The more unstable the patient is, the more rapid the extrication needs to be. However, this does not mean that every patient needs to be ripped out of the car. We as extrication specialists need to think of extrications as more removing the vehicle from around the patient than removing the patient from the vehicle. The more stable the patient is, the more detailed our techniques need to be. It’s important to assess the patient’s condition and then do what is right for them. If we are sacrificing patient care and patient outcomes for the expediency of speed, then we are doing a great disservice to the citizens we’ve all sworn to protect.
Step 1: Size-up
In order to achieve the best for our patients and “dominate the pin-in,” we must first focus on size-up. Size-up, as we know from the fireground, is an ongoing process. On the extrication scene, size-up involves the condition of the patient, the number of patients, the type of vehicle, the orientation of the vehicle, the weather, police activity, cargo and any number of additional variables, all of which have to be taken into account.
The size-up often begins while you’re en route. Dispatch information and reports from crews already on the scene can provide valuable information and allow you to get a head start on planning your extrication. Knowing that the car is on its top, up against a wall or down an embankment allows you to start thinking about your tactics for the way the vehicle is orientated.
Once on scene, coordinate with the other crews that are already operating (if you’re not the first on the scene). The working relationships that you have with the other crews that you run with are very important, so learn to work with or around whatever they’ve done at the time. You can’t always utilize their plans, but don’t discount the information they provide or the work they’ve performed either.
If something should have been done differently, address it during the critique/debrief stage and even later as a topic for training. I’ve worked with specialized extrication crews that show up on scene and begin criticizing everything that the first-in crews did. This is a great way to alienate other crewmembers who will be reluctant to call for your rig because they don’t want to deal with your attitude. You have to remember that early-arriving crews have a lot more to deal with when they arrive on scene than just preparing for the extrication. Tie in with them and see how the patient is.
As the specialized extrication unit, patient care should have already been addressed by the first-in crews, so get an update on the patient to see how much time you have for the extrication. Knowing this ahead of time helps determine how fast your extrication needs to be.
The next phase of size-up is the walkaround. This is your chance to “read the wreck.” It allows you to see the type of vehicle you’re dealing with, which allows you to determine the location of the vehicle’s critical components, such as the batteries and airbags. It also allows you to see how the vehicle is oriented, which can help you plan for vehicle stabilization and see what obstacles you’ll have to work around. Reading the wreck tells you what possible tactics are needed.
Step 2: Preparation
The next phase is the prep. Prepping allows crews to get everything ready and organized prior to beginning their cutting. This begins before the first person ever steps off the rig by making basic crew assignments.
Based on a crew of four, the officer is the extrication leader. As the officer, it’s your role to be in charge of the extrication. This starts with tying in with the first-arriving units, completing the size-up, determining specific tactics and implementing your plan. As the officer, you shouldn’t find yourself with tools in your hands or making any of the actual cuts. It’s your job to step back and ensure that the overall plan is being carried out.
Next is the chauffeur. This is your “gopher”—the person responsible for getting the tools off the rig and staged in the proper area. The chauffer has a lot to think about when staging the equipment. He has to know what the basic plan is so the right tools can be grabbed and staged for the job.
If the scene allows, I prefer the pump to be in the front or rear of the vehicle. This allows the crew to work on both sides of the vehicle without having to worry about the hose getting caught up by the tires when moving tools from one side to the other. Stage a generator/power unit close enough so the hoses can reach both sides but far enough away so everyone does not have to yell over the generator/power unit. This may seem minor, but communication is key on any extrication and eliminating as much noise as possible is important.
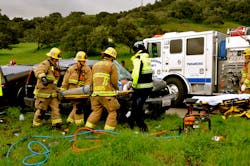
While the officer and chauffeur do their jobs, the remaining firefighters are responsible for stabilizing the vehicle. This is one of the most important jobs on the scene. An unstable vehicle could cause further injury to the patient and it could cause harm to the rescuers. Stabilization should be “rock solid,” meaning that the vehicle should not move. If we use cribbing, wedges or struts for stabilization, the result should be that the vehicle will not move in any direction. On a complex extrication, this can often take longer than the actual extrication itself.
When performing stabilization, we must remember why we are there—for the patient. The reason I bring this up again is because I have been on countless wrecks where stabilization has taken a back seat, often to the detriment of the patient. To truly be professionals, we have to think about the patient while we stabilize the vehicle. Every unnecessary movement that we cause affects the patient.
After the vehicle has been stabilized, disconnect the battery. This is a critical step that is often overlooked even by experienced crews. Disconnecting the battery removes the power source from the vehicle, and if for some reason you can’t turn off the ignition, this disarms the airbags.
The last phase of the prep is glass management. I like to remove all the glass during the prep phase. It’s easy to knock it out and be done with it. This makes it easier for the firefighter and patient not to worry about glass being taken every few minutes when plans change.
Step 3: Cutting
This is the phase when tools touch metal. Crews often rush into this phase without properly preparing for it. Preparing more on the front end reduces the amount of cutting time needed and provides a more organized scene. All the work done in the prep phase is going to pay off in the cutting phase.
The kind of extrication techniques and tactics required depend on the type of entrapment and the vehicle orientation. Again, we are removing the vehicle from the patient, not just the patient out of the vehicle. Just because we can manipulate them to get them out of an area doesn’t mean we always should.
A mistake I see often is not taking enough of the vehicle out from around the patient. Oftentimes when we do a “simple door pop,” we have to manipulate the victim more than we should to get them out. To alleviate this situation, I recommend replacing the simple door pop with the B-post blow out. This technique involves removing the entire B-post in order to provide enough room to get the patient out. The more room we have, the less manipulation for the patient.
Another technique we need to do away with is flapping a roof. If we’re going to go to the trouble of flapping a roof, it doesn’t take much more effort to just remove the roof completely. This gets the roof out of the way, providing even more options for accessing the patient.
Another tactic I encourage is utilizing ALL your tools. We need to get out of the spreaders- and cutters-only mindset. Utilize other tools, such as a reciprocating saw (Sawzall). This allows for other operations to be performed while cutting and spreading is taking place and, frankly, sometimes other tools can do a better job. For example, a reciprocating saw will actually cut through door posts faster than most cutters.
It’s important to keep in mind that the actual cutting phase is only a portion of the overall operation, and we can be expedient with our cutting time by utilizing the proper techniques from the start.
Step 4: Critique/debrief
The last phase is the debriefing. While this may not seem like a big deal, this is one of the most important steps. This is what sets up you and your crew for success on your next extrication, while also learning from your mistakes. Make it a habit to have a debriefing after each incident.
Oftentimes, as soon as the last patient is extricated, firefighters start breaking the scene down just out of habit. It’s critical to leave everything in place so crews can walk around the wreck to discuss the incident. This is a great training opportunity, not only for your crew but also for everyone else on the scene. Many times this leads to other crews opening their minds to different techniques—techniques that may help on the next extrication.
Train to dominate
In order to successfully “dominate the pin-in,” it takes hours of preparation and training—all for a few critical minutes on scene. This involves training not only with your crew but also other companies with whom you will be responding. Training cuts down on confusion at the scene by getting everyone on the same page, and it teaches initial crews what you will be doing when you arrive as well as things that they can do to help prepare for the extrication. It’s critical to train with your crew on as many different wrecks and scenarios as you can. This enhances their critical decision-making skills and prepares them for every possible situation.
In sum
Vehicle extrication has come a long way, but we still have a long way to go to ensure that we are putting the needs of the patient over the speed of just getting them out. We have to approach every extrication with our patient’s needs first, and ensure that we perform the four basic concepts discussed in this article. If you do this, you will surely dominate your next pin-in.
- See Theron Live at Firehouse Expo: Theron Woody will be presenting "Dominating the Pin-In," an eight-hour hands-on training class at Firehouse Expo 2017.
