It is critical to perform a thorough size-up when responding to an incident where air bags are going to be deployed. Potential hazards to members must be recognized and mitigated as soon as possible. Frequently, there are concerns about loads shifting, which can cause further injury to victims or rescuers. In industrial settings, other hazards may involve energized equipment or manufacturing processes that are still running. All members must perform continuous size-ups throughout the operation and act accordingly to ensure the safety of all involved.
Dispatch & Response
The process of response size-up should begin upon receipt of the alarm. Members should listen to the vital dispatch information to try and ascertain the type of incident, the mechanism of injury, the number of victims and other influencing factors. It is essential to start thinking about safely accessing the scene and the possible methods to remove the victim. It is valuable to have several feasible “game plans” in mind while responding, so that one can quickly be implemented upon arrival at the scene.
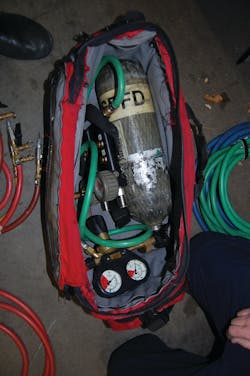
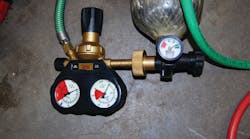
Air-bag incidents are often remote from the street, which makes it imperative to determine what resources may be needed and to bring in the necessary equipment right away. One of the worst things that can happen is to be unable to complete the removal process because essential equipment was inadvertently left on the apparatus. Members should confirm they are bringing air bags of various sizes, the air-bag system components, and cribbing (see Photo 1). Proper response includes ensuring members are getting off the rig with the appropriate equipment before they attempt to access the incident.
Scene Safety
The first concern for responding companies is determining whether the scene is safe. Members must evaluate the dangers that are present and promptly remove/reduce them before the extrication process begins. This type of scene is like any other rescue scene in which members must wear the appropriate personal protective equipment (PPE) including items for blood borne pathogen protection.
After the PPE needs are met, members should determine whether it is safe to enter the environment where the victim is trapped and approach the victim. Members must be sure the risk of fire, electrical hazards and other threatening conditions are removed or significantly reduced. If the incident involves machinery, this may mean securing the power to the machine itself. Before shutting off power to any machinery, talk to someone with knowledge of the machine for advisement on whether it might cause more harm than good.
Cribbing & Stabilization
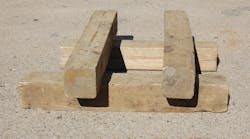
Members must safeguard the loads from shifting and potentially causing further injury to the victim. This involves using wheel chocks, step chocks and cribbing to stabilize the load and prevent vertical or horizontal movement – see article three in the series for more information. With incidents involving vehicles, members should chock the wheels and quickly minimize further movement using step chocks. After initial stabilization is achieved, members should consider what vital components or actions are required to stabilize the load during the lift. In most situations, a box crib will be utilized to achieve proper stabilization during the lift (see Photo 2). Members should try to place cribbing where it will not block the positioning of the air bags needed to perform the lift.
Several safety concerns must be kept in mind when building box cribbing. It is of primary importance that the bottom layer of the crib stack be solid in order to help spread the weight and keep the whole system solid (see Photo 3). This is especially true when the system is being constructed on soil, asphalt or other soft surfaces.
Members should take great caution when placing timbers to ensure their hand does not get caught between the load and the timber. Members should grasp the side of the timber or use another piece to push the timber into position (see Photo 4). This protects the member’s hand in case the load shifts and drops.
While constructing box cribs, each piece of timber should overlap the next piece by a minimum of four inches (see Photo 5). This overlap helps maintain the integrity of the system in the event that a particular piece shifts slightly. This overlap also comes into play when determining the maximum height for building a particular box crib. The standard rule for a square box crib is that the height should be only three times the width of the base.
Height to Width Ratio Math
The timber being used is 24 inches long with an overlap of 4 inches on each end.
- 24 inches – 8 inches = 16-inch base
- A 3:1 ratio is used only when the system is a square box crib.
- 16 inches x 3 = 48-inch maximum height
- A 1:1 ratio should be used if the crib is not square.
Members should ensure they have sufficient cribbing readily available for the incident. This includes having enough for the crib stacks supporting the air bags, as well as to crib the load when lifted. It is always preferable to have extra cribbing available in various sizes.
Initial Size-Up & Rescue Plan
Upon approach to the scene, members need to start sizing up several things: what is the status of the victim, what is causing the victim to be trapped, how is the victim trapped and what are the potential plans for extrication? These details must be carefully considered to guarantee a safe and efficient operation.
After scene safety issues are addressed, members must determine the status of the victim. Is the victim alive or deceased? Is the victim potentially viable if removed rapidly? This information helps ascertain whether members are operating in a rescue mode or a recovery mode. Members can slow down and methodically attempt the extrication process if the incident is deemed a recovery.
Once the operational mode is established, it is essential that members concentrate on figuring out exactly how the victim is trapped in order to devise the optimal extrication plan. This incident could involve having an extremity stuck in a machine or an entire torso pinned under a vehicle. Members should estimate how much movement will be required to free the victim.
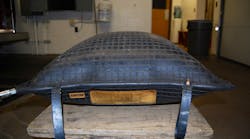
Members must determine the size of air bag that will be needed to accomplish the extrication (see Photo 6). The size of the air bag is dictated by the weight of the object, the potential lift points, the space available for placement of the air bag and the predicted amount of movement required. A sturdy lift point that can support the weight of the object must be selected. It is critical to remember the substantial impact that surface contact has on the lifting capacity of the air bag. A lift point that can support the object does no good if the surface area is so minimal that an air bag cannot lift the objective. See article two in the series for more information on lifting capacities.
Conclusion
Proper size-up is critically important for a successful operation involving an air-bag lift. Members must assess and attempt to remove or lessen any hazards that exist, which includes cribbing any unstable loads. After the scene is deemed safe, members must determine a logical plan for extrication of the victim. These initial actions will help prevent further injury to the victim and will make for a safer and more efficient operation.
For the full series of Air Bag Operations
