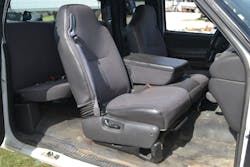
University of Extrication: Skills Update: Seatback Removal
Subject: Skills Update: Seatback Removal
Topic: Seatback Removal
Objective: Adapt and update the task of removal of a seatback section of a front seat.
Task: The rescue team shall study the design of modern vehicle front-seat structures, including those equipped with side-impact airbags, and create a plan for effective removal of the upright seatback section at a real-world incident scene.
This University of Extrication column looks at the task of the removal of a front-seat seatback section at a crash scene. With occupants trapped, the upright seatback component of the front seat must be removed to allow a trapped patient to be extricated. The seatback may also need to be removed to gain access to additional patients trapped deeper inside the vehicle.
Seat structural designs are changing on newer vehicles. These structural designs allow for more resistance to crash forces in both in side-impact and frontal or rear collisions. With side-impact airbags located along the edge of the seatback, newer vehicle seatbacks have to be stronger so they remain firm enough for the airbag to deploy and protect the occupants.
The connection point—the hinged bracket unit where the upright seatback joins and hinges to the lower seat-cushion section—is therefore becoming a stronger, more reinforced area. It is possible to find that this hinge bracket consists of double or even triple layers of high-strength steel. Cutting at this point would require a lot more work and is not the most efficient point to attack the seat for seatback removal.
As the hinge area gets stronger, the actual steel frame of the upright seatback, hidden beneath layers of upholstery and thick foam cushion, remains a lighter-weight and thinner structure compared to the seatback hinge bracket. If rescuers find that the seatback is in the way at an extrication scene and needs to be removed, there are several options to consider to deal with this challenge.
One quick option is to attempt to recline the seatback. This tactic may allow the seatback to be moved out of the pathway for patient removal, allowing for a quick solution. Electric-powered seat adjustments, however, may not be possible once 12-volt power has been shut down.
If the seatback section cannot be reclined, or if reclining still does not provide needed clearances, then total seatback removal should be considered. This is where knowledge of the anatomy of modern vehicle seats comes into play. Knowing that the thickest area, the most difficult area to cut through, is the seatback hinge itself, then this area is to be avoided.
Using a power cutter, reciprocating saw or cutting with an air chisel tool on the frame of the seatback itself (above the hinge bracket) will allow for total seatback removal. To be most effective and efficient, the rescuer must be able to place their cutting tool so that it cuts through the seatback side frame above both of the hinge brackets.
If undeployed seat-mounted airbags are present, the cut location should be below the stored gas inflator that is mounted on the seatback frame. The greatest risk of unintentional seat airbag deployment during seatback removal is not while the seatback frame is being cut, but when the yellow-shrouded wiring that powers the airbag inflator is cut through. Make sure that the ignition is off and that 12-volt power has been taken away prior to cutting the seatback unit off the seat cushion and lower frame when an undeployed set airbag is present.
Safety Measures That May Affect Seatback Removal
- Side-impact airbags
- Reinforced hinge brackets
- Double or triple layers of high-strength steel
About the Author
Ron Moore
RON MOORE, who is a Firehouse contributing editor, recently retired as a division chief with the McKinney, TX, Fire Department and now serves with Prosper, TX, Fire Rescue. He self-published the Vehicle Rescue 1-2-3 training manual and serves as the forum moderator for the extrication section of Firehouse.com . Moore can be contacted directly at [email protected].

